Motorcycle performance parts specialists. Helping you create your perfect motorbike.
Email: sales@conquestracingltd.com
Conquest Racing LTD
Unit 2B Clump Farm Ind Est, Tin Pot Lane, Shaftesbury Road, Blandford, Dorset, DT11 7TD, United Kingdom; Opening times 9:00-17:30 Monday-Thursday ; 9:00-13:00 Friday; Closed Saturday & Sunday; *Visiting by appointment only
Description
Hello and welcome to our shop.
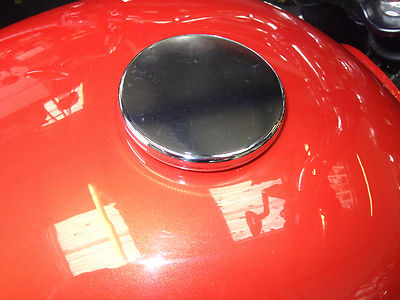
Do you own a Triumph with a screw fuel cap?
Have you scratched your tank due to removing the cap with your gloves?
Well now we have a protector to prevent scratches on your pride and joy.
Extremely easy to fit in less than 10 minutes.
Please read the simple instructions below fully prior to attempting installation and then you should be able to install this kit trouble-free.
We have a dedicated showroom on the south coast of England BH21 6SX where you are welcome to come and view the carbon prior to ordering. We have trained techinicians on site who will also fit for you too (fitting charge may apply).
What you will need:
Scissorsbrake/chain cleanerRubber squeegee (Not included)A well known baby shampoo (DO NOT USE ANYTHING ELSE)Tissue paperClean clothSmall bowlWarm waterClean hands
Step 1.
Fill the bowl with fresh warm water add several drops of a well known baby shampoo and submerge the protector in the water.
Step 2.
Clean the areas of paintwork thoroughly with the tissue and a degreaser or methylated spirits to remove any polish from the painted surface. (Always test a small area of paintwork first, especially if applying to fresh paintwork)
Step 3.
Soak the tissue in the soapy water and cover the surface of the paint work with a light film of soapy water.
Step 4
Peel back the part from the sheet whist contiuously submerging the protector. (Avoid touching the adhesive when dry, as this WILL leave a figerprint in the film) Make sure that your fingers are under the water when removing the adhesive protector.
Step 5
Lay the film onto the panel and slide into position.
Step 6
Once you are happy with the positioning of the panel, starting from the centre of the film and working out towards the edge squeegee using short strokes and suitable pressure to remove any fluid and air bubbles, this will secure the film into place.
Step 7
Once secure and you are happy with the position and no air bubbles can be seen start lightly dabbing the protector with a clean dry cloth (Don’t wipe as this will disturb the protector). Should you find an edge that won’t adhere hold down for 20-30 seconds using your thumb and the heat transfer from your body will help it activate the adhesive in this area.
Step 8
Leave to dry overnight and your finished.
Aftercare Instuctions:
Once the film has been applied you may treat the surface as you would a normal painted surface. However, please take care when polishing aspecially around the edges of the film as you may cause lifting.
Also the special material used is UV absorbable so as the years pass the paint under the protector will fade at the same rate, also it won’t discolour.
Slight modification may be needed to the protector for different models.
Thank you for looking and we wish you safe and happy riding.
Please see our other fantastic motorcycle clothing and accessories we have available.


